Appearance
Run Player
After test selection and environment setup, the actual Run is created and the user is redirected to the Run Player.
The Run Player is the view to execute tests in a Run and provides UI to show all necessary information and actions to the Tester. The Run Player provides the list of all tests to be executed and all scenarios for each tests.
The number of test scenarios depends on the selected number os environment devices and the number of rows in the linked dataset if applicable. If the user selected 3 devices, each test will have scenarios for each device. Additionally if a test is linked with test data, this number is multiplied by the number of rows in the Dataset.
The view
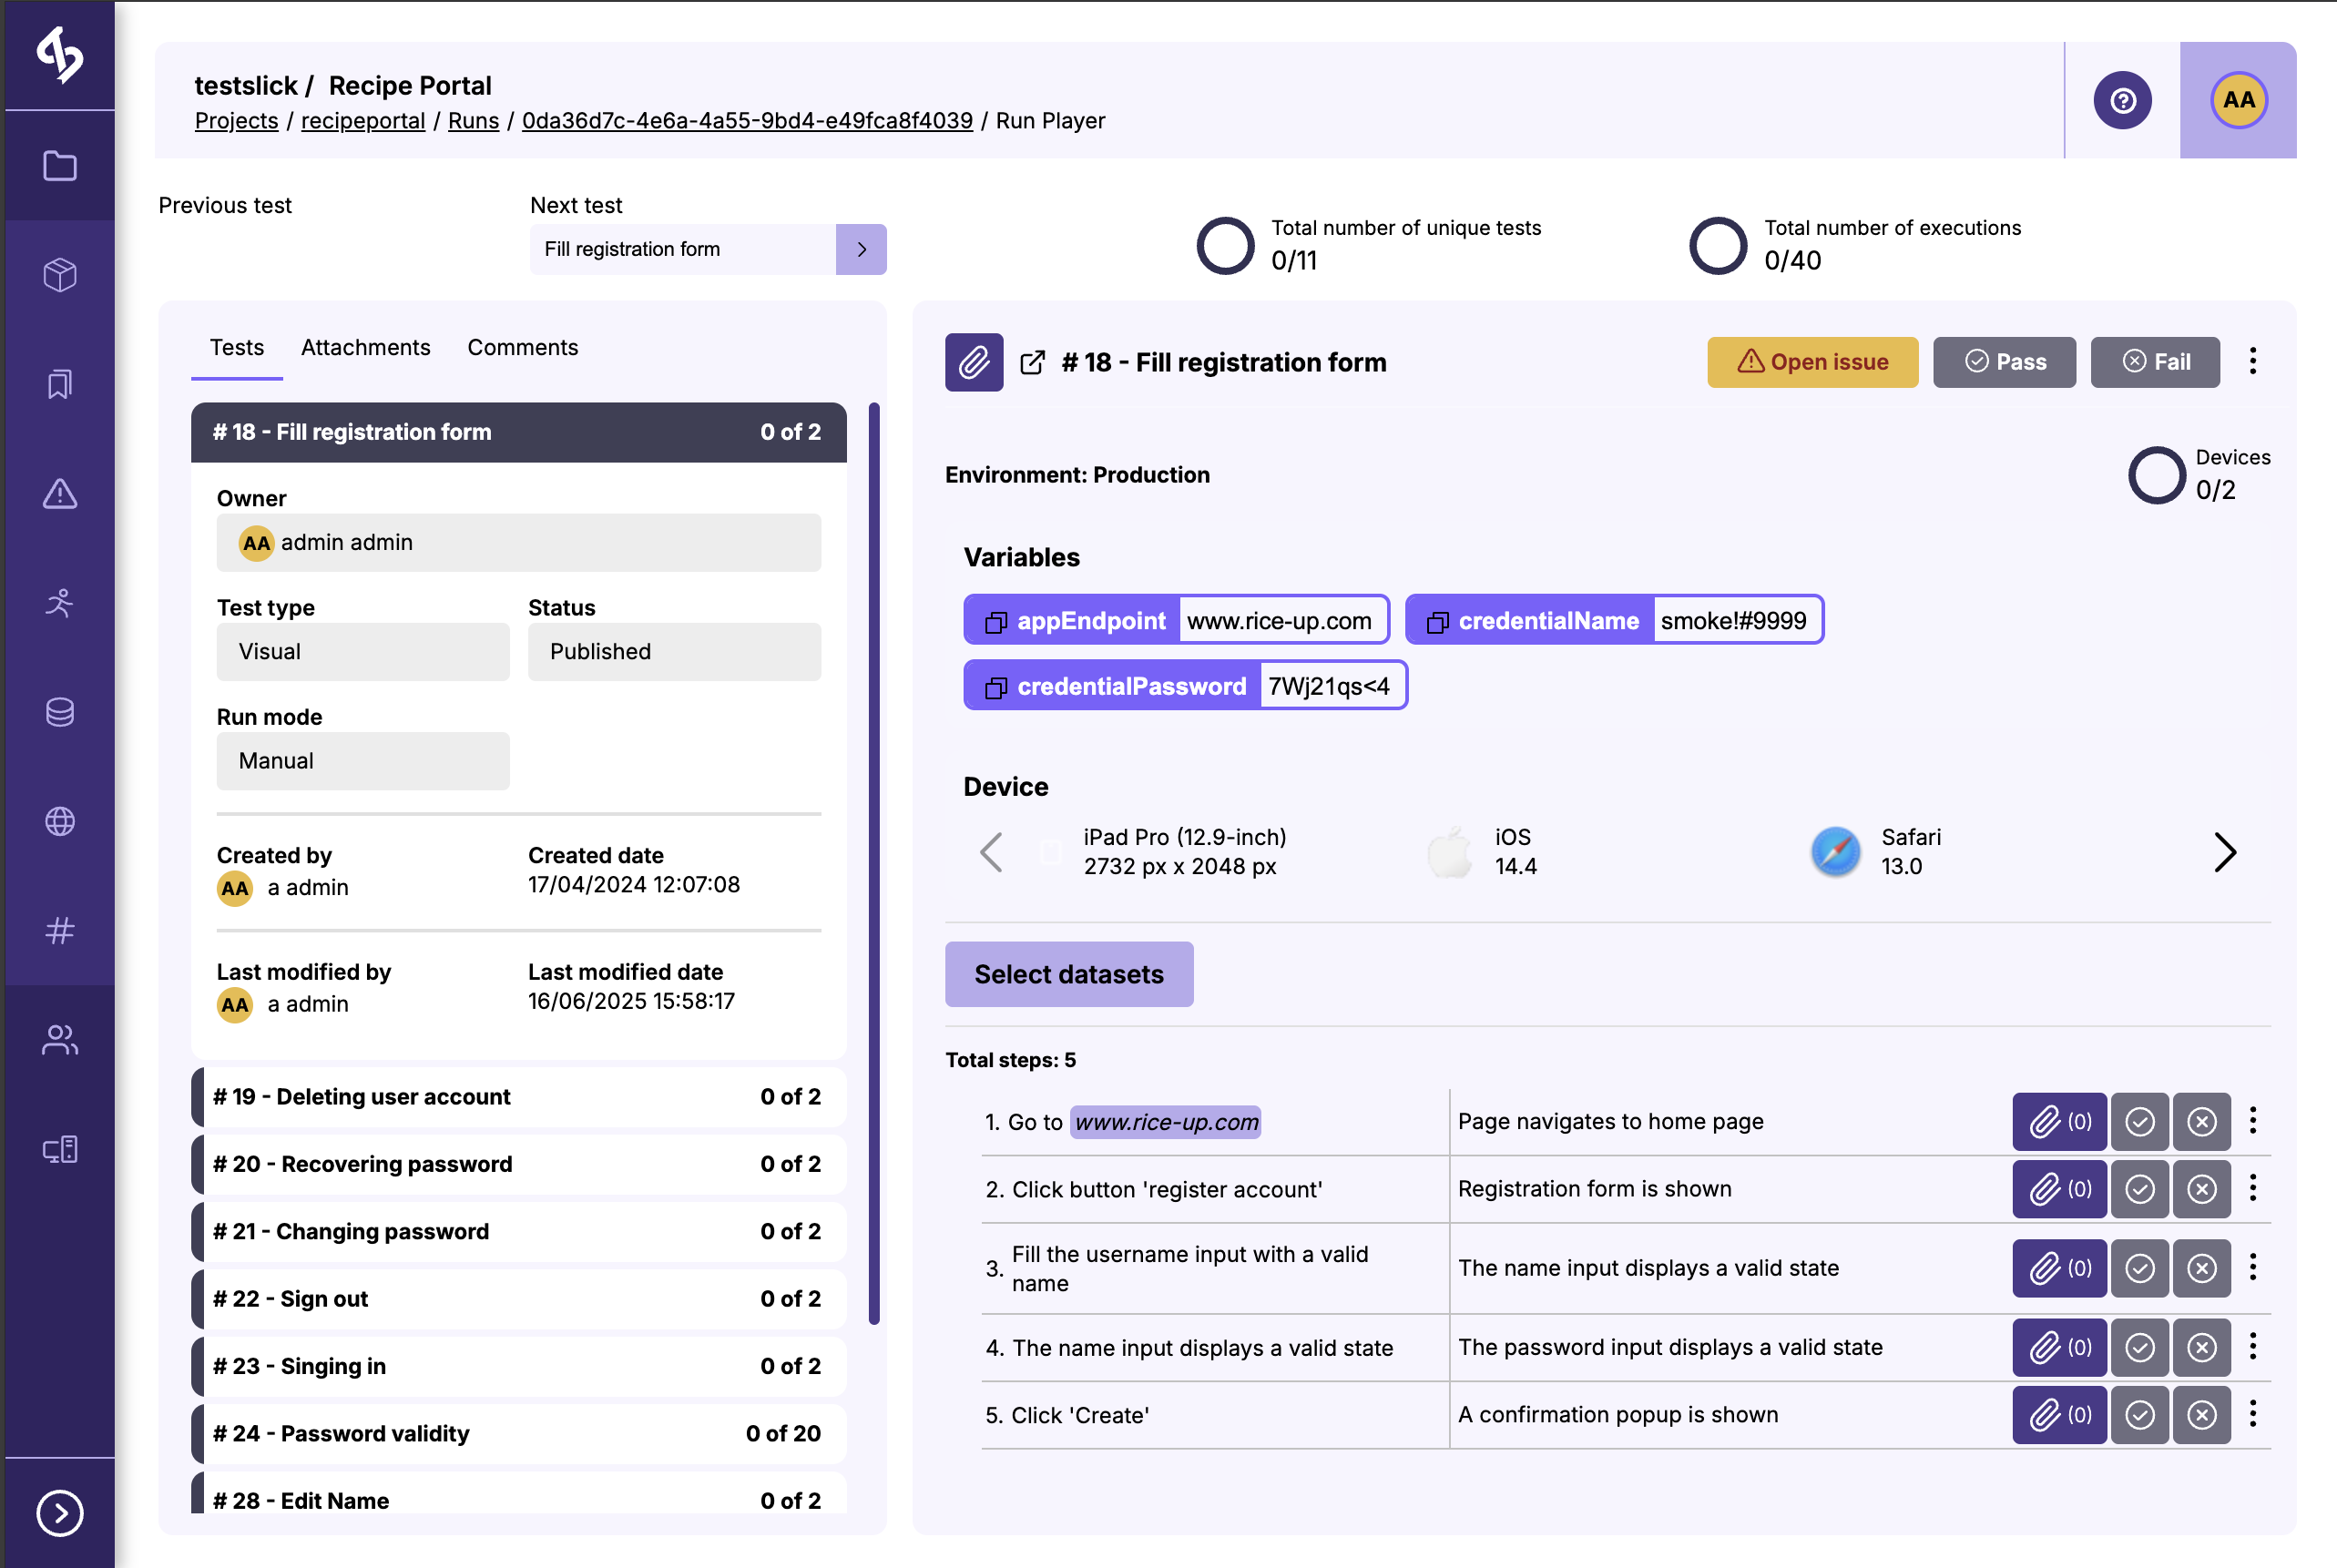
The page is split between tree sections
- Header: provides a summary of the completion status of the run
- Test list, attachments and comments: provides the complete list os tests to execute, document that were attached on a test scenario and comments related to the test scenario execution.
- Test board: provides information about the current test scenario that is being executed.
Header: execution summary
This section provides:
- Quick navigation links to the navigate between the next and previous test scenario
- A summary of all unique tests execution with a count of tests that have all their scenarios completed
- A summary of all unique scenarios with a count of all scenarios completed.
Test list, attachments and comments
Attachments and comments tabs are provided so the tester can leave documents and commentary on the current test scenario. Note that selecting a new test scenario will provide different group of attachments and comments.
But most importantly, the Test list tab lists all tests to be executed. The current tests will display an open card with some information regarding the test. The card header, in all tests displays the test name an a counter of executed scenarios vs. all test scenarios.
If the test already has a result, the header color will display the overall status of the test execution.
The user can jump to any test execution by clicking the test title he wishes to select.
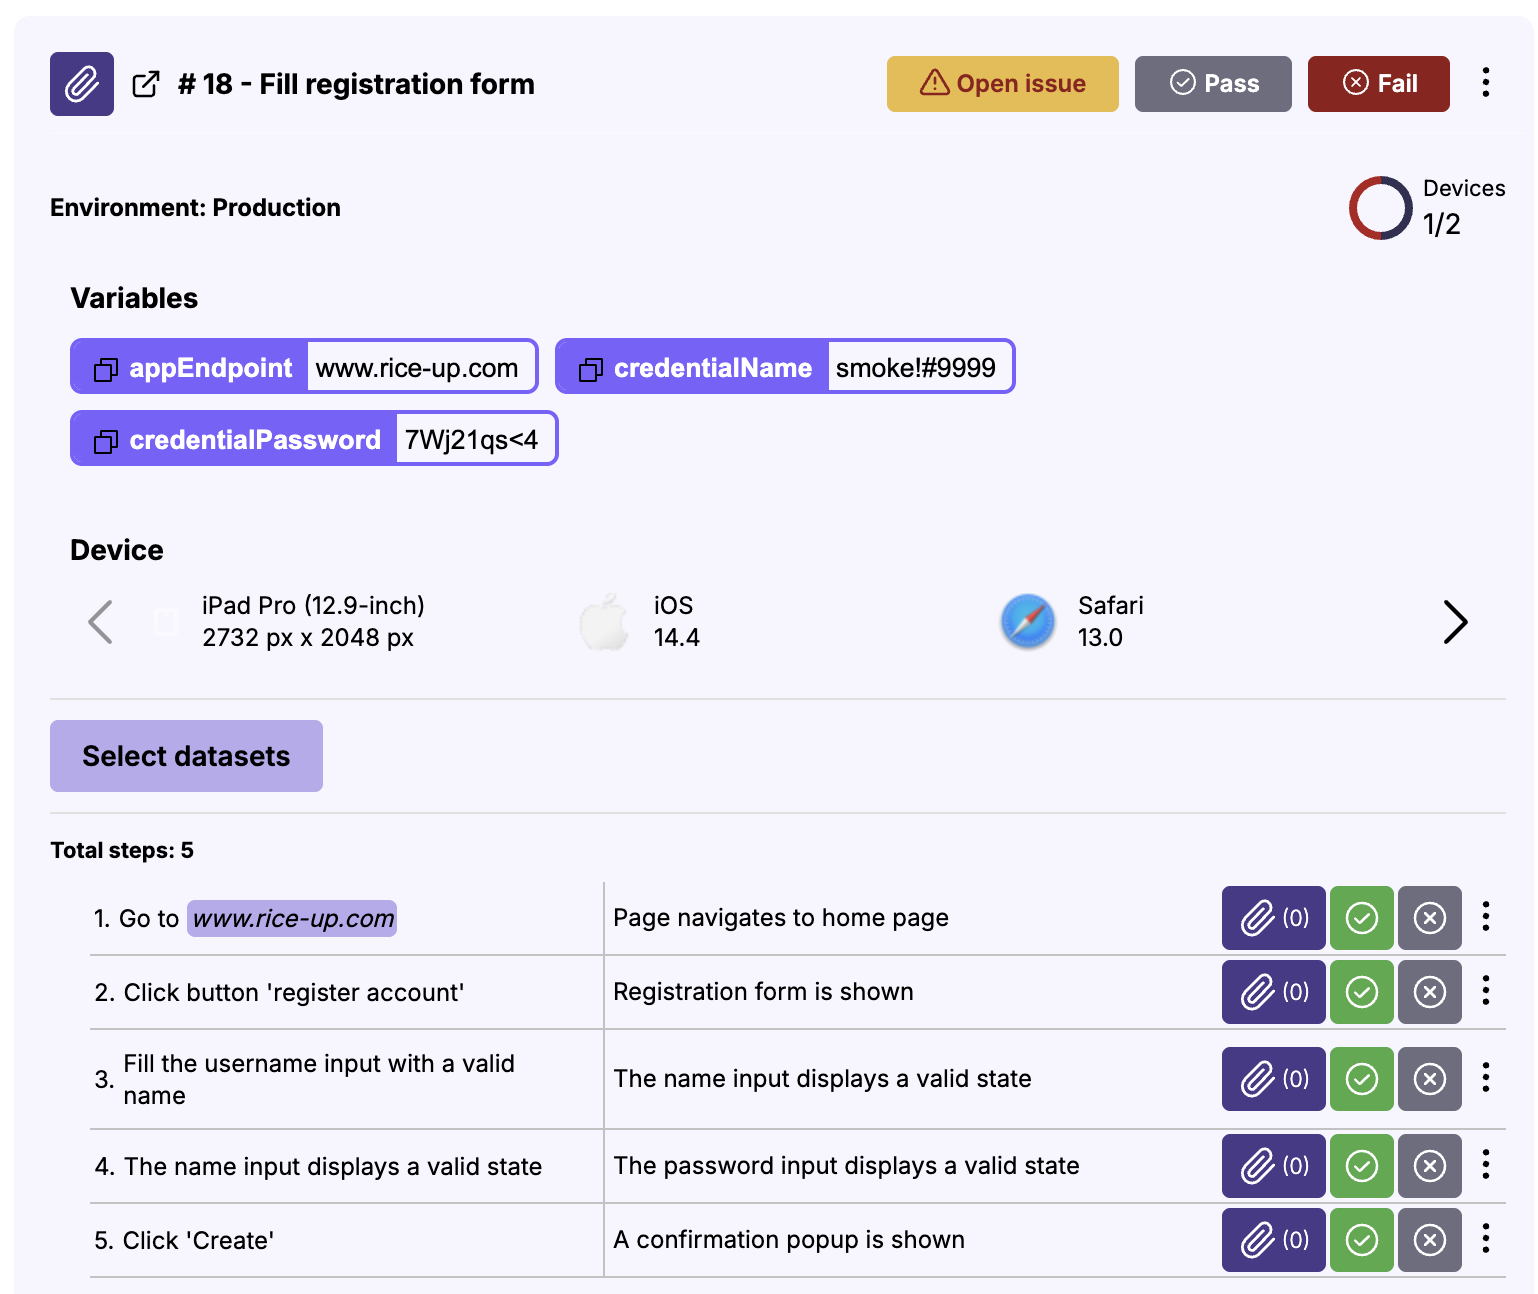
Test board
The board provides all information regarding:
- the test
- the device scenario (if available)
- the test data row (if available)
The first section provides the text fields: Description, Pre Conditions and Expected Results if they are not empty.
The second section provides information about the environment variables and the current device scenario:
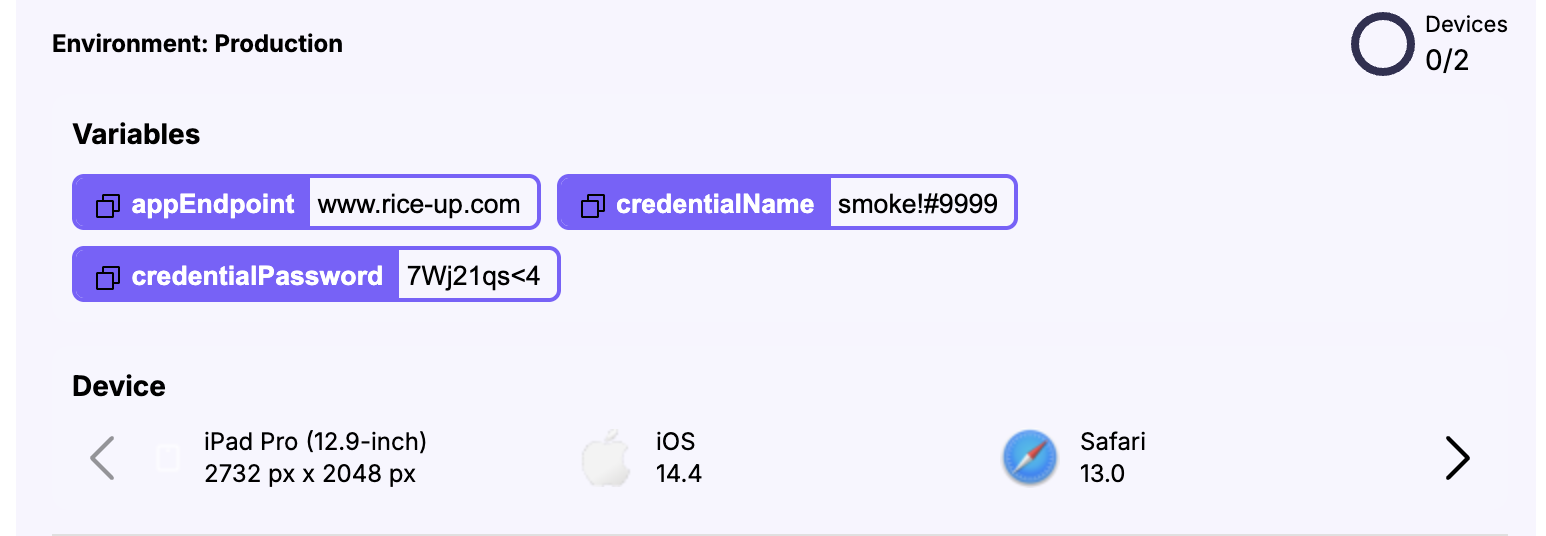
On the top right corner, it display the total number of devices including a counter of all completed device scenario in the current test. Once all scenarios of the current device are registered, the Run Player will repeat the execution for the next device until all device results are registered.
INFO
If the test execution doesn't include test data, there is a single device result to execute. On the other hand, if the test has Dataset scenarios, the user has to register the number of data rows to complete the device scenario
Next, if the test has a Dataset selected, the board provides information about the data row scenario
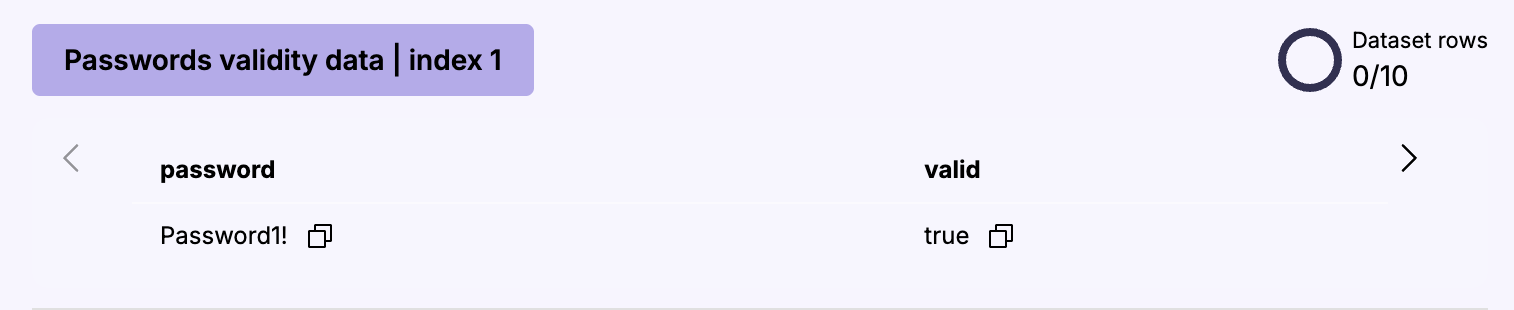
The section will display the current Dataset ow scenario to be executed. It also display the counter for the number of dataset rows and the current row selection.
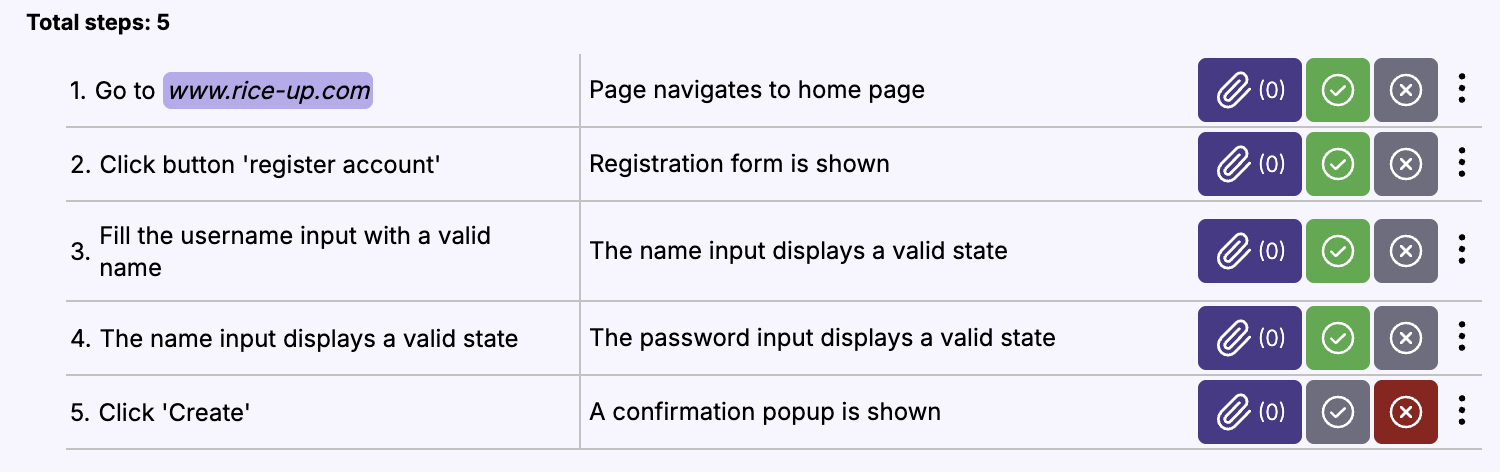
Finally we have the actual information with the tests details. The view depends of the test step type. For MARKDOWN or CODE, the view will display the content rendered based on the respective type. For test type STEPS, the view renders the list of steps:
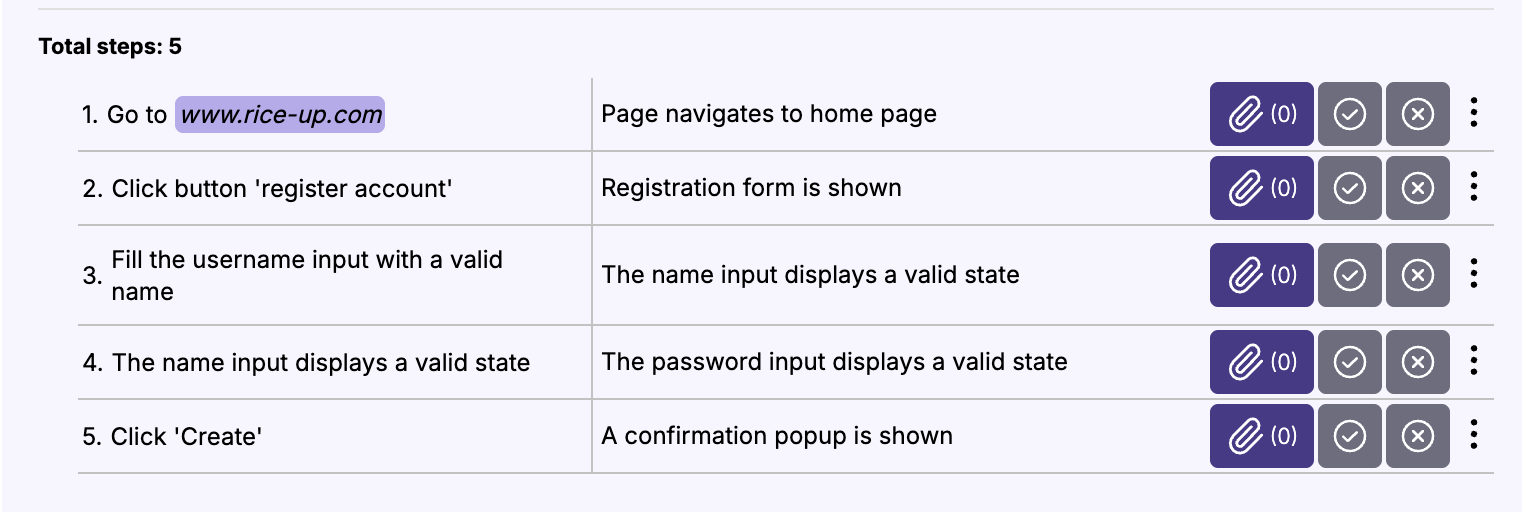
The step table displays the following UI
- the step description
- the step expected result
- a button to attach documents
- buttons to register the result
The test step description will also inject variable data either from the Environments variable or the test data row being executed. In the image, the execute step has the value
Go to $production.appEndpointand the Run Player injected the respective environment variable value into the step:
Go to www.rice-up.comRegistering Results
The user can register a result on the top right corner of the board section. Once selected, the test result is registered on the current test scenario. The user can now advance to the next scenario.

If a test is of type STEPS, the user can also register step results.
The Run Player will infer the Test scenario result based on the steps results. Regardless the user can overwrite the inferred result manually.
Reviewing results
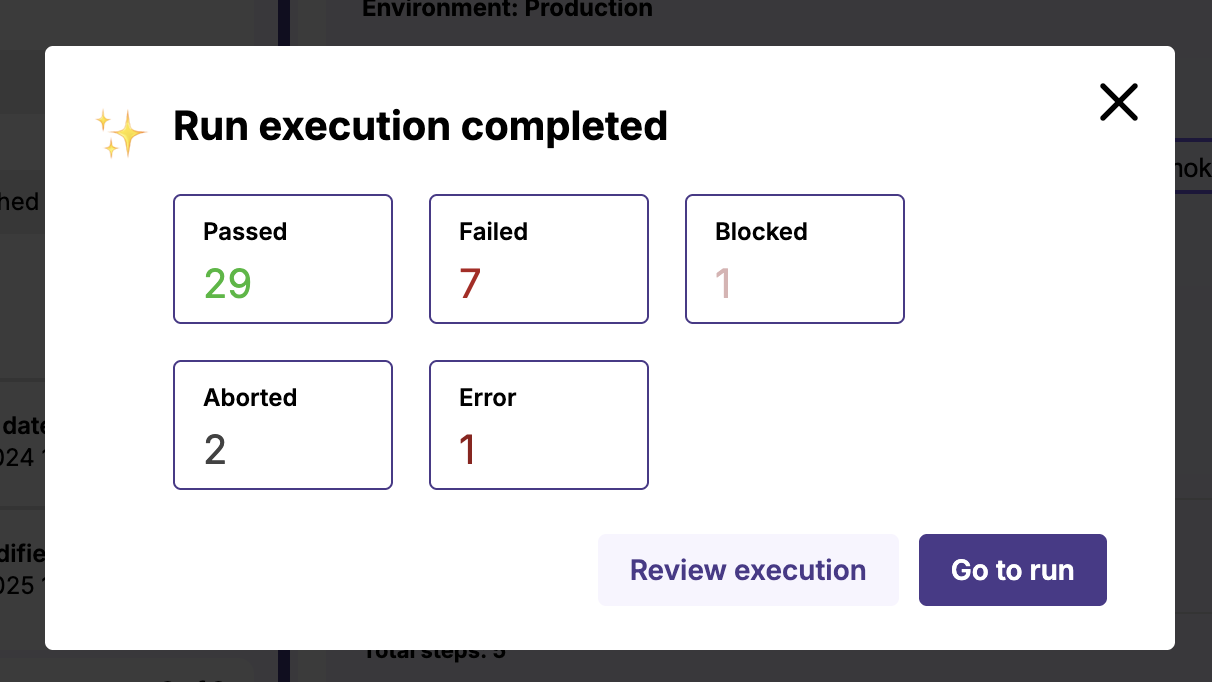
Once all scenarios have results, a popup will show a summary of the overall execution. The user can choose to navigate to the run view or review the execution. The latter option keeps the Run Player open and allows the Tester to review the execution and changing results if necessary.